Friday, June 28, 2013

Foodie Friday - Oxtail Stew

I used to cook mostly over the weekends until recently when I started to cook on late weekday nights. And all these, due to my Endo pot. My mum all but chug this new pot at me, telling me that it would be useful for me. Once I got over my laziness and took the pot out, I realised that it was a pressure pot! And so, I tried it out with an oxtail stew. 

:: The gathering list
- 1 packet of oxtail (I prefer buying those that had smaller pieces because they cook faster and stew better)
- 4 - 5 carrots cut into 1" pieces
- 1 can of button mushrooms
- 2 portobello mushrooms, sliced (optional item but we really love our shrooms)
- 1 large onion (cut into half and then sliced)
- 2 bay leaves
- 2 - 3 tablespoons of plain flour

:: Preparation
- Skim off the 'fats" and marinate the oxtail with a few dashes of pepper and red wine sauce (I used about 5 - 6 tablespoons of Masterfoods Red Wine and Garlic Marinade (I like this marinade because it is quicker and tasty too) for about 2 hours
* Alternative: I sometimes use Worchester sauce too and if you like a sourish taste to the dish to balance off the "meatiness", you can also add in 4 - 6 tomatoes (cut into halves)

:: To cook
- I did not use the Endo pot immediately for this because I wanted to caramelise the onions so I heat up my wok with about 2 tablespoons of olive oil and sauteed them
- Once the onions start to caramelise, I then added the oxtail (coated with flour) and portobello mushrooms and fry for about 3 - 5 mins
- Then I added carrots and button mushroom
- Added 3/4 bowl of water
- Stew on low heat for about 2 hours (checking on the water level and occasionally stirring it and then add on some more water - depending on your preference for amount of gravy)


- I then transferred to my Endo magic cooker 
- Heat it on stove (some users heat it for like 30 mins but because mine was already pre-cooked in the wok, I did half of the time instead)
- Cover and lock the lid
- Meal will be ready in 6 hours! 

Serve hot, over rice or mash! 

Wednesday, June 26, 2013

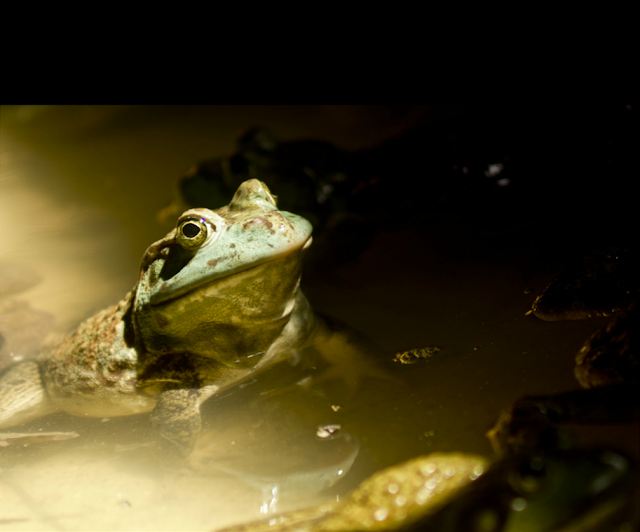
Outdoor Fun! A morning date with the frogs!

Just about a month before the haze hit us so badly and before the dengue cases started rising, the family took the opportunity to drive out to Sunggei Buloh area, particularly the farms. We are not new to the Kranji Heritage Trail having visited Bollywood Veggies numerous times as well as having done a staycation at the Kranji Resort too. It was a weekly visit for us for a while before we got so busy with work and socials. 

So on a nice Saturday morning and just 30 mins drive from our place and we arrived at... 


:: A bit of background
Jurong Frog Farm was started in 1981 by Mr. Wan Bock Thiaw where the focus was very much on farming American Bullfrogs. That morning when we visited, his youngest daughter was there (who tends to the place and works there full time). 

The father-daughter team then looked into R&D and marketing of Hashima Jelly and the company now sells bottled Hashima jelly and Frog Essence (which I have yet to try). 

In the compound, besides the frog farm, there is a shop which not only sells frozen American Bullfrog meat but also sells exotic meat such as venison, which I bought a packet of but have yet to fry them.
We also spotted some educational displays on the life cycle of frogs...  (was too short to get a photo without the reflection of light)


The farm area is basically cemented blocks which house the American Bullfrogs (where the deep croaks greet you before you reach). As we started introducing amphibians to Dumpling when she was young, she was not scared of them at all. But a word of caution: we saw 2 families with wailing toddlers that morning when they saw the frogs. 


Jurong Frog Farm offers tours too but we did not go for it that morning. This is something which I will definitely be considering the next time we are there! (FYI, there is apparently a mating pond!) 

:: The 'exotic' food
Being a frog meat lover family, we ordered skewers of fried frog meat as a morning snack too. 


The skewers of meat were yummy (but too salty for me) - batter was crunchy and tasty while the meat was moist even though they were deep fried. Because these are fried so they come 'piping hot' so do take care not to bite into it immediately lest you burn your tongue. 

(For those keen on frying your own frog meat, the shop sells the flour used for the batter in addition to selling frozen frog meat too. If fried food is not for you, here's our recipe on "Gong Bao Frog Legs".)


Dumpling loving the meat as much as I do... 

But my favourite item there? The ready-boiled Hashima Jelly. Yes yes yes, I know what Hashima jelly is but I am not at all turned off by it. :p 


An instagram pic shared that morning: Dumpling about to tuck into Hashima Jelly

And if you do not already know, here's some benefits of Hashima Jelly! 

And after you are done? Sinks are provided for easy cleaning / washing too! Gotta love their wall art! :) 


Keen to visit?

Here's more details:
Address:
51 (Plot 56)
Lim Chu Kang Lane 6
Singapore 718864

Website: http://www.jurongfrogfarm.com.sg/index.html
T: 6791 7229

Opening hours:
Tuesday - Friday (Strictly By Appointment only)
Saturday, Sunday and Public Holidays (9.00am - 5.30pm)

This is part of an Outdoor Fun series where I aim to share posts on 'places to go' and 'things to do' with the kiddos. :)

Tuesday, June 25, 2013

A "NIVEA Body UV Whitening Serum with SPF 25" 14-Day Experience!

Motherhood is an amazing journey yet at the same thing, this endless mad rush of “things” to be done for and with the kid where I rarely have time for myself. 

I am guilty of neglecting my skincare regime for the past few years too - with the mad rush of transiting from work and then to a homeschooling mum daily. What was deemed as a regular regime of washing, masking, toning and moisturizing, has become very much a ‘slap and go’ job.

What’s frightening for me is that the years of neglect is finally catching up. The skin on my limbs is dry and my feet looks flaky (something which my manicurist nags at me to no end)!

It does not help that I dislike the idea of applying any form of sunscreen on my body because most leave a sticky and oily feeling which is often made worse in our hot and humid weather here. But the irony is I truly love the outdoors where I head out to farms, zoo, water play, etc. with Dumpling whenever I can but yup, without any sunscreen protection! What’s scary for me is recently *gasp* Dumpling pointed at my arms recently and ask me “Mama, why do you have brown dots on your arms?” A hawt sexy mama I am so NOT turning out to be!

Above photos: what 4.5 years of neglect looks like.
Left photo: pic is that of my foot where my skintone is uneven, dry and cracked! Right pic: photo is of my arm and as you can see, I have uneven pigmentation.

A closer look at my lifestyle reveals that I am in an air-conditioned environment the whole time! No wonder my skin is dry! Added to the fact that another key ‘role’ of mine in the family is that…


I am also the official driver! So with years of sunlight and damage from the UVA and UVB rays, my arms are now darker, sun-damaged and have more brown spots than my face!


While guilty of paying more attention to my face (ahem, since that is the ‘part’ which everyone sees!) than my body, I shudder to think how wrinkled / dry / brown I will look in 10 years’ time!

So I decided that I should start taking better care of myself and started on a new bodycare regime too and I started using NIVEA Body UV Whitening Serum with SPF25.

I was pleasantly surprised that it dispels my belief that all sunscreens are sticky and oily. The texture was smooth, easy to apply (not thick or oily) and it was absorbed very quickly! I am also sensitive to smells and do not like any heavy flora scent. This is not an issue with NIVEA Body UV Whitening Serum with SPF25 as it has a light fruity scent instead. What I like too is that it is a serum that moisturizes and has sun protection for the body! So I need only to use one product just before driving. 

Best of all, it fits into my work bag perfectly!
I am embarking on a 14-day experience using this product and will be sharing more in my next post!

Disclaimer: This is an advertorial for NIVEA and is part of a series of “14-day experience” for NIVEA Body UV Whitening Serum SPF25. I have been compensated for this post. All opinions I have given are mine and may differ from others but my sharing is based on my personal usage and experience of the product. 

Friday, June 21, 2013

No haze indoor fun - Friday Five!

With the weekend around the corner and the haze NOT going away anytime soon, here's some activities to keep your little ones engaged!

1) Cardboard FUN - Make a robot photo frame for dad to bring to work! 
Total activity time: approx. 1 hour 

Dumpling did this craft at Kids' Gallery booth at the recent SmartKids Asia. You can easily replicate it too!

Look for boxes around the house - all you need is just one box which is one a good size. Use the flaps for the neck and arms and the sides for the face and body. Cut out a rectangle from the flap for a body and paint over. Embellish with buttons, sequins, felt and draw on the eyes.


2) Bring out all the old toys and set up a shop! 
Total activity time: approx. 60 mins - 90mins (depending on number of kids, items sold, etc. ;p) 

Nothing beats imaginative play - start digging through the storeroom and bring out "old toys" / cookery set. You will be amazed how much fond memories it brings back for both you and the kiddos!


3) Make a easy and healthy fruit juice Popsicle! 
Total activity time: approx. 30 mins 

If you have fresh fruit juice, all the more better. If you do not, you can use ready ones sold in cartoons. Get your kiddo to use a wooden / plastic knife (children should be supervised at all times!) to help with the cutting of fruits where you can add to the juice that extra yummilicious fruity bite!


4) Dig for kits!
Total activity time: approx. 30 - 40 mins to excavate and another 15 mins to wash and assemble 

I do not know about you but Dumpling has received many many kits over the years - from Art kits to Science kits and to Excavation kits for her birthdays. I have a habit of not using them immediately but instead, keep them for a 'rainy' day. Well, while we certainly can do with some rain now but this hazy period is certainly an apt time to use them. :) 


No kits? No problem - here's a simple science experiment you can do with just an egg and some vinegar

5) Games and Puzzles!
Total activity time: approx. 30 - 60 mins for each game 

Toys such as board games, puzzles, etc., are often the best in engaging the little ones where it helps to also nurture their imagination and creativity. 


 In the meantime, stay healthy and safe during this period - load up on water and Vitamin C and, keep your windows closed!


Wednesday, June 19, 2013

Teaching Preschoolers Chinese - 路德系列: 路德做汤

Chinese is still one area which I try very hard to support from home and because we started reading with Dumpling from young, she developed a love for books at a tender age too. So for a lot of the activities that we do at home, I try very hard to use a literature based approach where we can extend to activities after reading the title. 

We bought a series called 路德系列 which is simple as it has repetitive words yet introduces vocabulary. The series is split into 4 themes with 6 titles in each. Having read through a few titles with her, I decided to extend it into a series of small activities. 

I basically made an A4 booklet for each title where the cover and title of the book were pasted on the cover. 

  
For this title, it is on 路德做汤 so on Day 1, after reading, we extended into hands-on learning with some of the actual vegetables and ingredients used in the story. I also got Dumpling to try and cut up some of the vegetables (with my help)...

Which I later used it for a stew... 


While I was cooking, I left her with papers, scissors, glue and a "pot" to make her own stew...

 On Day 2, we worked on vocabulary and word recognition


 And on Day 3, we worked on other things such as verbal skills and 量词。

I have finally finished checking the pack and here's the link to share! (As always, the pack was created for homelearning support and is not meant for any sales / for any profit making activities. Please do not edit / tweak it in any way. If you spot a mistake / typo or you have any feedback, please email me at beanienus{at}gmail.com. Thank you!  

Friday, June 14, 2013

Foodie Fridays - Ayam Nangka Lemak!

I first tried this dish when my helper came back from Indonesia and brought it back along for us to try. The version that I tried then was the 'dry version' where there is no gravy and when it was dried, it basically looked 'suspicious'. But being a foodie, I thought to try anyhow and boy, was I surprised when I took a bite.

It was a combustion of saltiness, spiciness with the fragrance of coconut milk and the texture was smooth and it tasted 'meaty'. I did not know what it was and took another bite and another and another. :p That was the start of my 'love affair' with jackfruit cooked in coconut milk.

:: The gathering list
For the paste:
- 2 stalks of lemongrass cut into small pieces
- 2 pieces of ginger (an inch thick)
- 9 fresh chili
- A handful of dried chili (yes, I am one of those who cook by the agar agar way :p)
- 8 shallots
- 12 cloves of garlic
- 6 - 9 pieces of bird's eye chili (depending on your preference of the level of spiciness)
- 2 bay leaves
- 3 - 5 lime leaves
- 2 slices of belachan
- 2 table spoons of ikan bilis (washed and soaked)

- 1 whole chicken 
- half an unriped jackfruit (we had to order this a week in advance from the vegetable seller at our wet market)

:: Preparation
1) Chop up chicken and marinate with oyster sauce, soya sauce, pepper and corn flour. Set aside in fridge (best to marinate for at least 2 hours)
2) Oil knife and cut up unripe jackfruit (fruit + seed) into small 1" pieces. The core however, is to be discarded 
3) Pre boil the unripe jackfruit in a pot of water with about 1 teaspoon of salt added to it for 30mins. Do not cut short this step as this cuts down much stewing time. Strain and set aside


4) Blend the ingredients for the paste (stirring in water - I added about half a cup slowly) and set aside
5) Add in 2 table spoons of oil, heat up wok and added in paste from step 4 and stir fry


6) Add in chicken and coat chicken with paste. Continue to fry for about 5 minutes 
7) Add in the cooked jackfruit (from step 3) and continue to fry for another 5 minutes
8) Add in half a bowl of chicken stock (I used Swanson brand) and half a bowl water. Mix well, cover and simmer for half an hour over low heat.  
9) Add in coconut cream (I used Kara brand, 200 ml), mix well and stew for another 30 mins on low heat

Serve hot over rice and enjoy!

 I really love this dish. The nangka (having been stewed for a while) soaks up the 'goodness' of the gravy: spicy yet creamy, fragrant yet not too heavy.


We are the DinoFamily

Quick DIY Father's Day Gift Ideas

With the flu bug flying around this year for the past month in our home, Dumpling and I have not been out much to do much shopping for Father's Day Gift. I spent some time googling online for fun ideas to do with Dumpling and OMG, I chanced upon this lovely idea of using Lego for cufflinks! And so, with a dig through my cupboards and the Lego blocks, we made this! Ta da!

All that you need to do is just to stick the back of a Lego brick to an old cufflink / new cufflink base. :)

Now, I also wanted to add on more fun ideas where Dumpling can have some input into what she wants to give and we decided on a coupon book!

I basically just used power point to create rectangles where I added on free clip art images. Dumpling then has the free play of deciding what Daddy can redeem for :) She was giggling the whole night as she doodled, added stickers and letters to the pages. And because it is a surprise, we are not revealing what's inside. :p


Looking for more ideas? You can also DIY a simple photo frame with duct tape written by Adora who guest post for me. Or is Dad a foodie? You can also consider making your very own jam with just 4 easy-to-get ingredients!

Here's more Father's Day gift / craft ideas to share:
1) Danielle Space
2) The Crafty Crow
3) Powerful Mothering

And lastly, for those who wish to e tend this to homelearning, here's a printable pack:
Father's Day Pack by Enchanted Homeschooling Mom (subscription needed but at a flat one time fee only!)

Happy Father's Day in advance to all the Daddies out there! 
Have a great one!
Mama Sue

Thursday, June 13, 2013

A blend and a scrape - Viola! Lychee Sorbet

Sponsored Review

The last time I shopped for a blender was at least 7 years ago. 7 years could mean a huge change in family dynamics - then I was cooking lesser as it was just the 2 of us. 7 years later, my blender is stained, I have a child and my blender can no longer cope with the amount of blending we now do with frequent homecook meals.

One of the things I like to use my blender for are smoothies and making of ice creams. I am a fan of Jamie Oliver and have several of his cookbooks. I like that his recipes always hones in on simplicity - quick and easy meals and using seasonal fresh produce that are easily available.


It has been a hot couple of months here in Singapore. Dumpling, like all other kids, like anything cold and sweet. Lychees are in season now and after buying a box of it, I know I just had to try my hand at making Sorbet.

Traditionally used as a palate cleanser, Sorbet has since evolved to being 'more'. Our family has always been into making our own jams and such hence, I wanted to dabble into Sorbet. But more than that, a 'no ice-cream maker' sorbet which is easy to make! This recipe is also great for lactose intolerant children!

So away we peeled and blended the lychees!


:: Recipe:
1. 1/2 cup of lemon juice
2. 1/2 cup of white sugar
3. 1 cup of water
4. 3 cups of lychee 

Step 1: Boil items 1 to 3 till sugar melted
Step 2: Blend the Lychees
Step 3: Add in Lychees and simmer on low fire for about 10 - 15 mins
Step 4: Set aside in a tupperware to cool and freeze it overnight in the freezer with a lid on
Step 5: Use a fork to scrape the frozen Sorbet to introduce 'air' and also to create the granulated effect

And tada! Serve with some berries, peppermint leaves or even add a dash of Vodka! Enjoy! 


I must say that one of the key main differences in this Jamie Oliver blender is that it is made of glass. I like kitchen aids to be sturdy and this certainly fits into the category. Though heavy, the blending jar is also deep (1.5l effective liquid capacity) and was able to blend the entire load of Lychees at one go, saving me precious time in the kitchen. Additionally, I am pleased to note that it bears the Philips Green Logo which basically means that it offers a significant environmental improvement in one or more of the Philips Green Focal Areas — Energy efficiency, Packaging, Hazardous substances, Weight, Recycling and disposal and Lifetime reliability.


Keep life simple with the PHILIPS | Jamie Oliver range which includes a food processor (S$268), handblender (S$128) and blender (S$108).

Available at leading electronics and departmental stores.


Disclaimer: This is a sponsored review. All opinions expressed are however based on my own experience. 
Related Posts Plugin for WordPress, Blogger...

Be warned: All content in this blog is copyright protected.

MyFreeCopyright.com Registered & Protected